Month: March 2020

on

Hey everyone, thanks for reading. Just recently I helped a friend install his new Dobinsons suspension onto his newly acquired 2018 Toyota 4Runner SR5 2×4 model. He wanted to pick up the front end a bit to help level out the vehicle and also to add a better spring rate to the rear, allowing him to support the full vehicle better. His 4Runner has a 3rd row seat that is regularly used to take the full load of 7 people in the SUV.

Before I lose you, this same installation applies to these vehicles:

4th Gen Toyota 4Runner 2003 to 2009

5th Gen Toyota 4Runner 2010 to 2020+

Lexus GX470 2003 to 2009

Lexus GX460 2010 to 2020+

Toyota Prado 120

Toyota Prado 150

Toyota FJ Cruiser (all years)

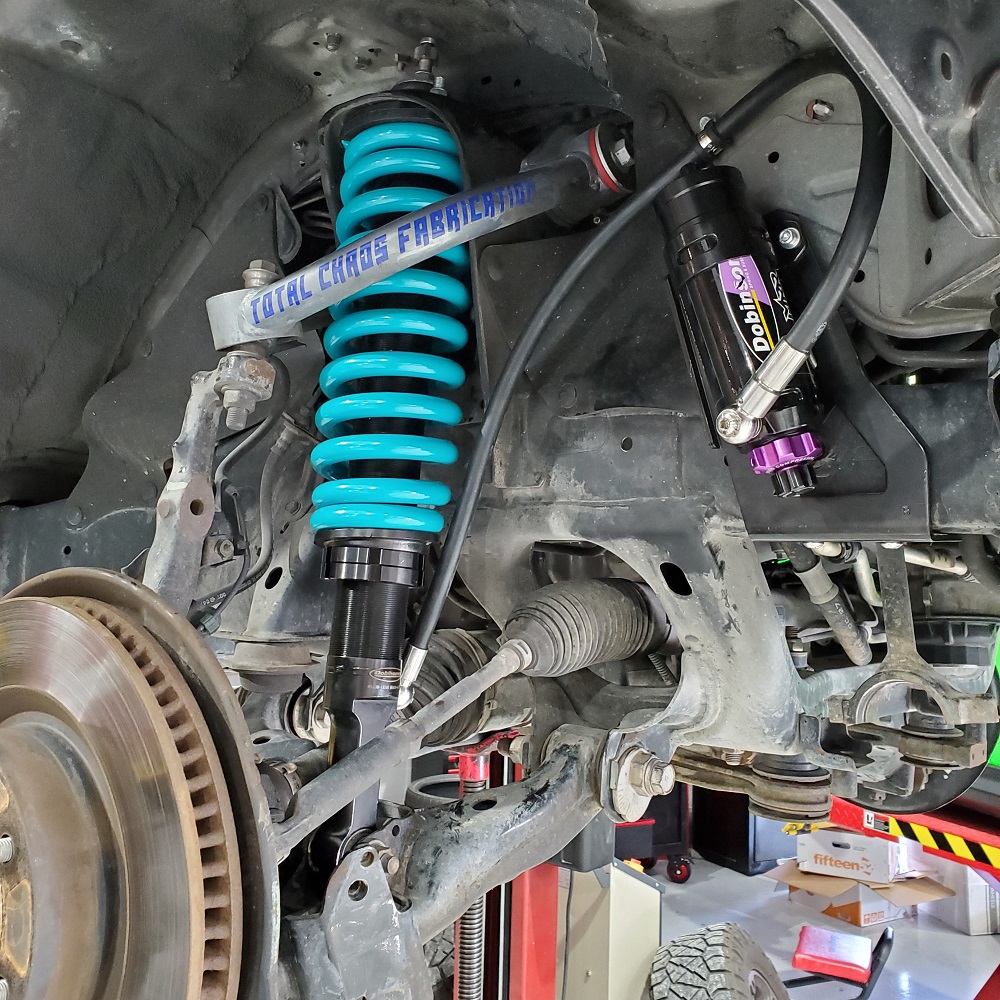
Now I’ve worked on many different Toyota’s and 4×4’s over the years, and this is a method of installation that goes back to my old Suzuki 4×4 days with Sidekicks, Trackers, Vitara’s and Grand Vitara’s. The absolute easiest method to install the front struts is to swing the lower control arm down and out of the way to easily remove the strut assembly without having to disconnect hardly anything. 2 lower ball joint bolts per side, loosen the lower control arm bolts at the cams, per side, and then undo the strut top 3 nuts and the main lower bolt. This leaves the UCA’s untouched, the sway bar links in place set to factory torque, the brake and ABS lines in place, and all the steering links also untouched. When possible, it is most definitely better to remove the least amount of bolts necessary, because if you put something back together wrong or not tight enough, you can run into other issues later.

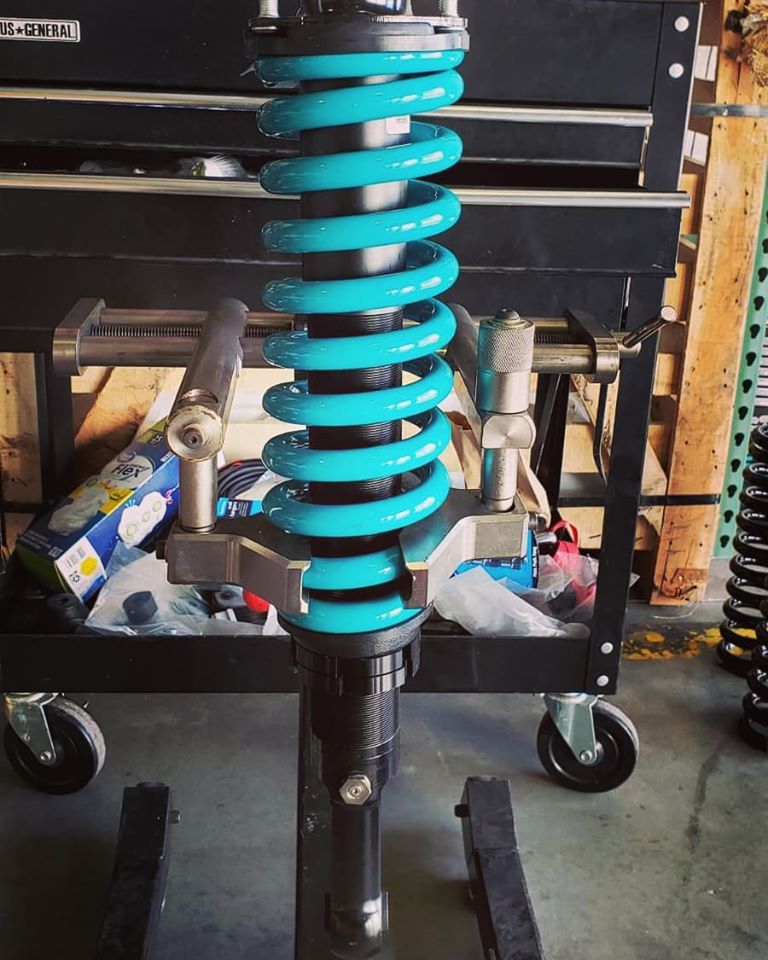
In this video I try to describe as clearly as possible what steps it takes to change out the full suspension (front strut assemblies, rear coils and rear shocks) in under 3 hours. Granted there were 3 of us on site, me being the one who knows the steps and guiding the other 2 while being the cameraman, you need to know that the 2 guys doing the majority of the work have never worked on a Toyota or a 4×4 like this before. Plus we ran into a couple of hiccups by not realizing we had to take down the front skid plate at first (the last 2 I worked on already had those removed) and in the rear I forgot to disconnect the sway bar, as the last 2 I worked on had KDSS with a different sway bar system that was already undone and out of the way). Those slight delays probably added maybe 20 minutes, so we would have been done in 2.5 hours from start to finish, with water breaks, a few chats, and taking our time with hand tools. You’re still wondering how this is possible? We ordered the front struts, coils and new top mounts fully pre-assembled. A professional with the correct strut spring compressor can do that job in a matter of minutes, but to do it at home is very time consuming, dangerous, and really not worth the effort when you can just pay to have it done before the parts are shipped to you, and bolt them in like my video shows.

So please check out this video and be sure to hit like on it. So many people these days are doing their own installation at home and so many people get bad advice to disconnect all sorts of things that really aren’t needed, so hopefully if you see someone that needs help, you can share this video and help guide them for a simpler method.

on

Hey everyone!! Geez, what a crazy couple of weeks it’s been. You already know what’s going on, so I’ll tell you what I’ve been doing. I’ve been trying to set aside the time to make a whole series of videos to put up on my YouTube channel, and this has finally been the week for that!! I’ve probably got another 20 products I want to film, and other ideas I have as well for some really informative content to put up on YouTube.

I’ve had my own YouTube account now since 2006, and I always used it to chronicle the offroading I would do with my Suzuki club in Washington State that I used to be fully involved with, called WAZUKS, so you’ll see a lot of older videos on the channel still. The video quality back then was really quite poor and the compression of them was really bad, but still, I don’t want to remove any of them as it brings back great memories and also there were some really fun clips in there too. Also, I used to travel A LOT to Central and South America for work, so I’d take side trips when and where I could and video as much of that as well. Be sure to check out the videos in Guyana. It’s incredible.

That brings me to today and the videos I’ve taken this week. They’re all Dobinsons related so far, so I’ve put together a playlist of basically product unboxing, what the item is, why you’d even use it, and how to use it or how to install it. This information gets asked of me all the time, and video is definitely the best format to show it to those who want to know.

Here’s the link to the channel: https://www.youtube.com/c/exitoffroad

Please consider subscribing to the channel. Don’t worry about “the bell” and setting up notifications, I don’t really care about that. Having a good subscriber count is what matters, and it’s free to you, so please add me to your list of subscriptions.

So far I’ve added these videos:

on

Hello again, and thanks for spending some time on my site. This is Mike and I want to throw a bit of info together here to bring attention to the new line of Dobinsons shocks that have started hitting the market here in the USA in February and March. Dobinsons have spent years developing and upgrading their line of monotube shocks, and they are finally as developed as they need to be for a full scale release here in the USA.

First we have the Dobinsons IMS shocks and struts. IMS stands for Internal reservoir Monotube Shocks. These are large body and piston shocks and struts with a small internal reservoir, resulting in simple installation since there is no hose or reservoir to worry about while also using the full range of Dobinsons coils. The front struts have a fully threaded body, which is incredibly rare these days. Most companies choose the cheaper method of using clips with multiple grooves cut into the body, and while that can work well, it’s still limited in fine tuning the height, and also tuning out a lean that can be quite common in Toyota IFS vehicles such as Tacomas and older 4Runners. These use a double adjuster nut like their big brother the MRR’s, even though they only really need one. The top nut sets right below the coil seat and sets the ride height, while the 2nd adjuster nut is set right below it and locked in so that the height doesn’t change at all. As coils move up and down in standard suspension movement, they can try to rotate and rotating an adjustable height collar is not what we won’t, so the 2nd nut locks it in place.

I’ve put together this instruction sheet for more info on how to set and adjust the height of these. See the link here: https://exitoffroad.com/wp-content/uploads/2020/03/ExitOffroad.com-IMS_MRA-adjustment.pdf

Full specs of the IMS shocks can be found here: https://exitoffroad.com/brochure-ims-shocks/

And the MRA shocks? Monotube Remote Adjustable. Those are 3-way adjustable versions of the IMS with external reservoir. With dual speed compression (DSC) adjusters on the reservoir and rebound adjustment on the shock/strut shaft itself, these shocks and struts offer as much adjustment that you could possibly need. You can set them as soft or hard as you want, which brings great versatility for those who go from empty to fully loaded for a trip, or for those who tow and need better support when towing, but then they can adjust it back softer when not towing. Dobinsons are bringing MRA’s for the best selling SUV’s in the USA including Tacoma, 4Runner, GX470, GX460, Land Cruiser, and more others to come in the future!!

For full information on the MRA’s, check out the brochure here: https://exitoffroad.com/brochure-mrr-adjustable-shocks/

Feel free to shoot me an email, mike@exitoffroad.com for any questions you have regarding these new shocks. I’m constantly updating the site with ETA’s and any new products that come up also, so please check back often.

Thanks for reading,

-Mike

dobinsons mra
dobinsons mra