Here at Exit Offroad, we have been selling the KDSS Spacer kits from Treaty Oak Offroad for several months, and what better way to understand how they work than to actually install a kit here and see what sort of difference and results we get from it??!!!
On Mike’s 5th Gen 4Runner this past weekend, he installed a set of the Treaty Oak Offroad KDSS Spacer kit to the front passenger side and rear both sides. These are machined aluminum blocks that go between the sway bar link and the top of the OE bushing of the sway bar to space the sway bar down. On a regular sway bar setup, you’d simply add longer links, but since the KDSS system uses much much thicker and stronger sway bars and links, as well as a high pressure hydraulic system to raise and lower the sway bars for cornering and stability, it’s best not to mess with those fixed links, and the hydraulic piston side can’t be spaced down any other way anyway!!
This video might go into more detail than most want to see, but with a little bit of maneuvering and figuring things out, this will help you to do the install on your own vehicle faster (hopefully) and also understand why they are a good addition to your vehicle.
As a side note, the same spacers suit 5th Gen 4Runners, Lexus GX460, and Toyota Prado 150’s. They all use the same frame and KDSS system.
Initial driving impressions 2 days after the install are better/flatter cornering, and also when hitting pot holes or uneven parts of the road, it’s not quite as hard of a jolt as it was before. Setting the sway bars into a flatter and more stock configuration helps on regular sway bar systems, and these spacers seem to have done the same thing with KDSS.
Here is the video on the Exit Offroad YouTube Channel:
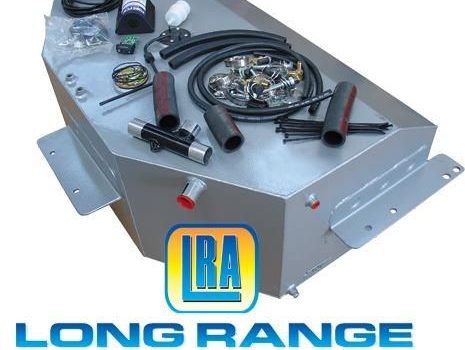
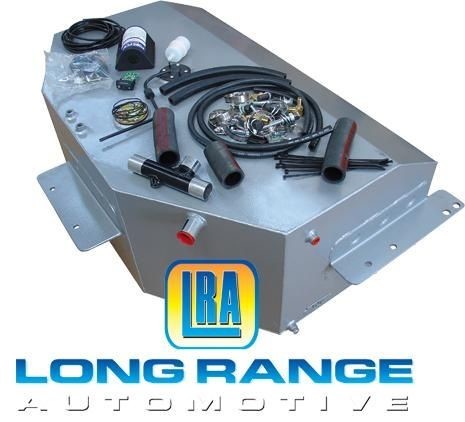
Working with the best brands in the business, Exit Offroad is now a dealer for Long Range Automotive (LRA) Fuel Tanks!! These are Australian made for the tough needs of the long-distance tourer who just can’t get by with their stock fuel tank. Keeping additional fuel on board is a necessity when heading out into nowhere, or even yet when hitting the interstate for a cross-country voyage to get to the unknown, and carrying that fuel can be extremely tricky in some vehicles as there’s only so much room available. Sure, jerry cans are very cheap and hold fuel quite well, but where will you keep them? And how much can you carry? 10 gallons? Why not just replace your original tank with a bigger one, or add an auxiliary tank in the back? With these options from LRA, you could double or even triple your fuel capacity. It varies by vehicle of course, and all of the common US-spec vehicle tanks are now listed on this website.
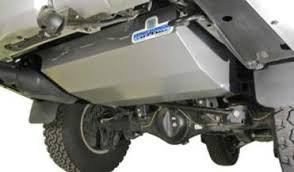
There are 2 types of tanks being offered. The most simple one is a replacement tank, that replaces your original tank with a larger tank, reusing all the original fuel pickup lines, fuel sender, and all those parts that connect to your OE tank. Super simple to install, and adds good capacity. The 2nd type of tank is an aux (auxiliary) tank that fits behind the rear axle, in front of the rear bumper. This is usually where a spare tire was mounted on most vehicles. These tanks can vary in size, but they’re normally 20-30 gallons or so, and they feed fuel from there over into the main tank. This is the best way to maximize your range, with the only downside being that the spare needs to be moved to the rear bumper, but don’t worry, because we sell rear bumpers for most vehicles as well!!
Alright, so you’ve added a larger tank, but what could you do with it? If you have an FJ Cruiser for example, with a stock 19 gallon fuel tank, and your vehicle is lifted with bumpers front and rear, gear for a trip, people, food, and beer of course, you’re lucky to be getting 14MPG. That’s 266 miles on a good day from completely full to absolutely empty. Every 3 hours of freeway driving you’ll need to stop and refuel, taking up time every time you need to do that. With an aux tank from LRA, adding 30 gallons will add a little over 400 miles of range to your existing tank. Not enough? OK, replace the main tank too for an additional 11 gallons, and now you’re up to a total of 79 gallons, which is pretty ridiculous, but now you could potentially go for 1106 miles before you have to fill up!!! That’s a lot of fuel for sure, but you won’t be relying on finding gas stations for days. You get where we’re going here.
Imagine another scenario where you live in the south where hurricane evacuations could come into play. Fuel up, and don’t worry about finding fuel when leaving town. You’ll be all set, and have the capacity you need to get far away without needing to stop for fuel.
Here’s the current list of LRA tanks offered by Exit Offroad:
Alright people, I know a lot of you are still waiting on the external resi version of these (the MRA’s), but they’re just not done yet. But the new IMS are finally in stock and shipping now for the Toyota Tundra from 2007 onwards!!
IMS = Internal resi Monotube Shock.
Adjustable height front struts (uses clips), massive 2.6″ size body front and rear with 60mm pistons, IFP (Internal Floating Piston) technology
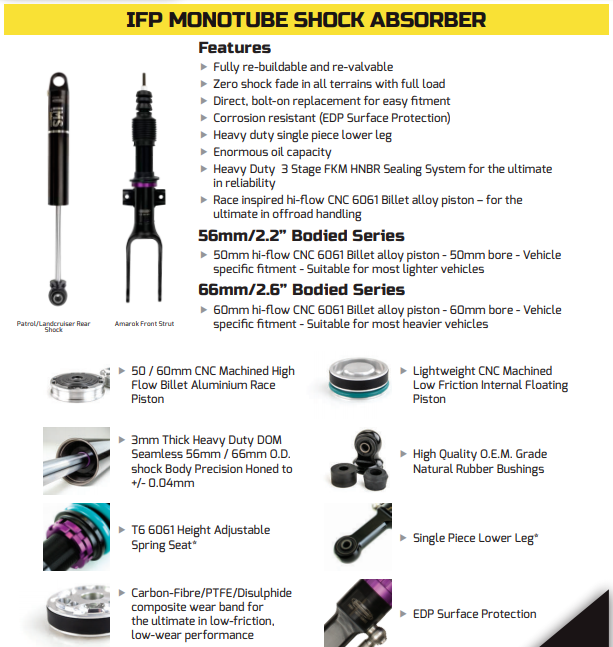
Fully rebuildable and re-valvable
Zero shock fade in all terrains with full load
Direct, bolt-on replacement for easy fitment
IFP – Internal Floating Piston, separates oil and nitrogen
Corrosion resistant (EDP Surface Protection)
Heavy duty single piece lower leg
Enormous oil capacity
Heavy Duty 3 Stage FKM HNBR Sealing System for the ultimate in reliability
Race inspired hi-flow CNC 6061 Billet alloy piston – for the ultimate in offroad handling
66mm/2.6” Bodied Series – 60mm hi-flow CNC 6061 Billet alloy piston – 60mm bore – Vehicle specific fitment – Suitable for most heavier vehicles
I’ll try and predict some of your questions here, and add to this post as needed. 1. They use stock configuration coils (pigtail at the bottom, flat ground top), so they can be used with stock coils or Dobinsons coils, or a suitable replacement that uses the same configuration 2. If you already have Dobinsons twin tubes, you can replace just them with the IMS struts and shocks without needing anything else. 3. The fronts fit the 2008+ Sequoia. There are rear IMS coming for those too. I mention this because I know there’s a lot of Tundra/Sequoia crossover on the forum here. 4. There is no set rebuilt period. If you ever had a problem with them, you’d do a rebuild at that time, which is generally just new seals and oil. 5. The fronts are to be set at the stock/standard coil seat height and then the coils do the lifting without adding additional preload. They can go up from there as needed to correct a lean or to compensate for added weight if needed to regain lost height. 6. I have to say it even though a lot of people understand already, but the rear shocks don’t affect the lift height. Only changing the leaf springs or blocks, or add-a-leafs will affect the rear lift height.
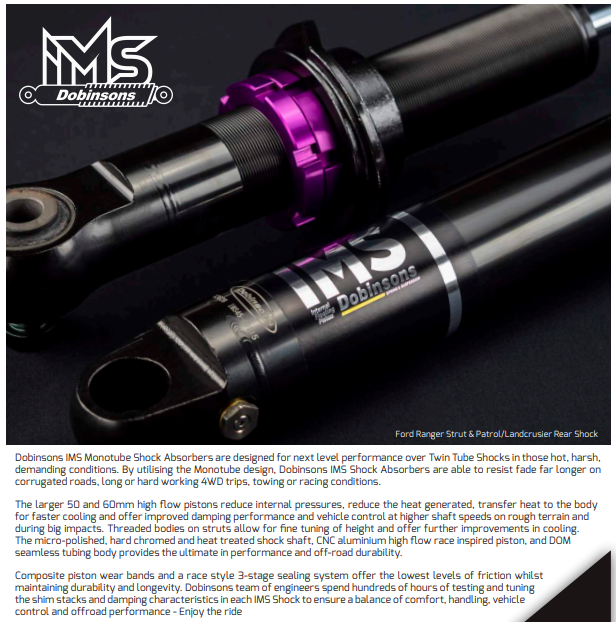
Some words from Dobinsons: Dobinsons IMS Monotube Shock Absorbers are designed for next level performance over Twin Tube Shocks in those hot, harsh, demanding conditions. By utilizing the Monotube design, Dobinsons IMS Shock Absorbers are able to resist fade far longer on corrugated roads, long or hard working 4WD trips, towing or racing conditions.
The larger 60mm high flow pistons reduce internal pressures, reduce the heat generated, transfer heat to the body for faster cooling and offer improved damping performance and vehicle control at higher shaft speeds on rough terrain and during big impacts. Threaded bodies on struts allow for fine tuning of height and offer further improvements in cooling.
The micro-polished, hard chromed and heat treated shock shaft, CNC aluminum high flow race inspired piston, and DOM seamless tubing body provides the ultimate in performance and off-road durability.
Composite piston wear bands and a race style 3-stage sealing system offer the lowest levels of friction whilst maintaining durability and longevity. Dobinsons team of engineers spend hundreds of hours of testing and tuning the shim stacks and damping characteristics in each IMS Shock to ensure a balance of comfort, handling, vehicle control and off-road performance – Enjoy the ride
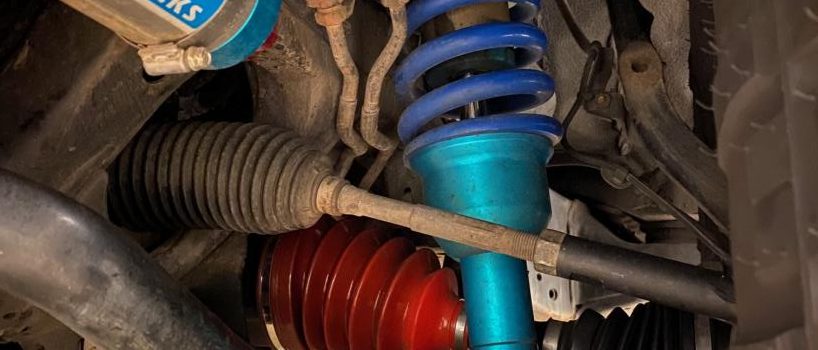
It’s such a common question that someone with a Toyota 4Runner, Prado or Landcruiser and Lexus GX470 or GX460 asks all the time, so I made a quick video to show visually what KDSS is, how to recognize it, and where the valve block is that may need to be opened when doing a suspension install, or for helping to level a vehicle after a suspension install is complete. This is very common for people to say “my car is leaning 1″ to one side after I finished my install and I don’t know what’s wrong”. That’s a hydraulic lean.
Hopefully this brief posting will teach you what you need to know about KDSS, and so that you can spot it on your vehicle to determine if you’ll have extra steps involved during installation, whether you’ll be limited in rear lift height due to KDSS (nothing over 2.5″ is recommended), and also how the system works!!
Thanks for reading. -Mike at Exit Offroad.
Oh, bonus video link, showing a bad lean after suspension installation with KDSS: